
How To TIG Weld: Penetration Shouldn't Be The Goal
Why Welding Penetration Is Not The Goal (And What To Focus On Instead)
If you've been grinding away at TIG welding and still can't figure out why your penetration is inconsistent, there's a good chance you're chasing the wrong thing. Most beginners treat penetration as the goal: something to dial in through machine settings and sheer willpower. But here's what experience teaches you: penetration is not the goal. It's the result.
Getting that distinction right changes everything about how you learn.
Why obsessing over penetration keeps you stuck
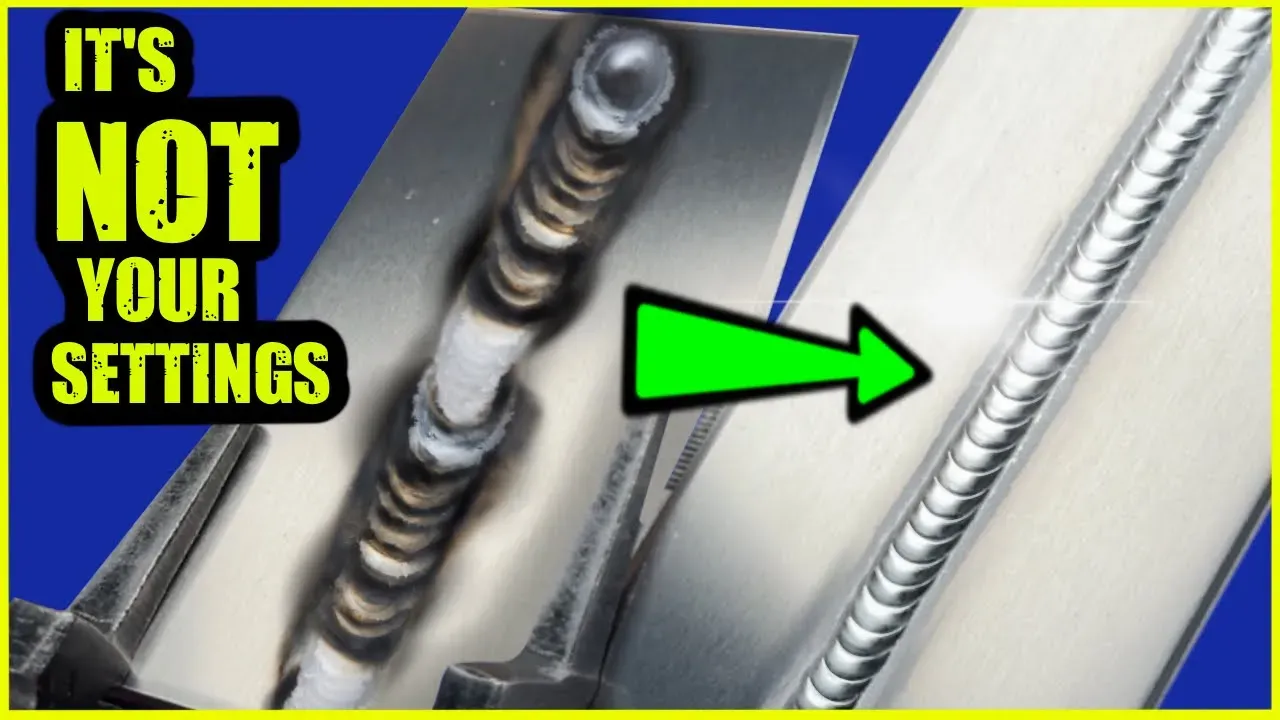
When people don't see penetration punching through to the back side, the instinct is to crank up the amps or mess with the machine. But most of the time, the machine isn't the problem. The top side is.
A weld that's wandering, inconsistent, or poorly controlled on top is never going to give you reliable results underneath. You can't fix the back side without first fixing what you can see. And yet most people skip straight to worrying about what they can't see.
A big, uncontrolled weld on top (hard edges, inconsistent cleaning action, sloppy filler additions) tells you everything. The penetration problem is just a symptom. The top side is the cause.
Focus on what you can actually see
You can't see the back of a joint while you're welding. So why is that where your attention is?
The top side is where your focus belongs. Clean edges that blend smoothly into the base material. Cleaning action that looks consistent all the way through. Puddle size that stays the same from the start of the pass to the end, even as the plate gets hot. When all of those details are right, penetration takes care of itself.
This is the foundation of how I teach in my online programs and my TIG welding textbook.
The progression that actually works:
Step 1: The dry arc exercise
Before you introduce filler rod, you need to learn heat control on its own. The dry arc exercise is exactly that - you create a puddle, establish it at the right size, and maintain it as you travel along the plate. No filler. Just you, the torch, and the puddle.
Once you've run a pass, flip the plate. On thinner material like 1/8" (3.2mm), you'll see real heat evidence on the back. On thicker material, you'll see what I call ghost penetration - a faint trace that tells you heat got into the base material. Use that as a guide, not a goal. What matters at this stage is that the top side is clean, consistent, and controlled from start to finish.
Step 2: Stringer beads
When your heat control is solid, it's time to introduce filler. Run stringer beads along a scribed line on a blank piece of plate; same concept as the dry arc, but now you're matching filler additions to your heat input.
The details to check: edges are straight and smooth, cleaning action is consistent, the distance between each filler step is even, and there are no hard edges or fusion problems. Every pass should look the same from the beginning to the end.
Want to really dig into what's happening inside the material? Cut a cross-section of the plate, polish the edge with a Scotch-Brite grinder, and while the metal is still warm, apply oven cleaner. Let it sit for a couple of minutes - it'll etch the surface and reveal how deep your fusion actually went. Use good ventilation when you do this. The fumes are not something you want to breathe in.
Step 3: Butt joints
Now it's time to take everything you've prepped and learned and apply it to a real joint. Start with thicker material as it's more forgiving. You can push the heat and focus on the top side without the risk of burning through. Same checklist applies: clean edges, consistent cleaning action, proper filler amount.
Once you're getting good results on thicker material, move down to thinner. Run dry arcs on the new thickness first, then stringer beads, then joints. Same progression, new challenge.
Use checkpoints, not panic
Think of this entire process as a series of checkpoints. If the butt joint top side isn't right, you don't push forward, you go back to stringer beads. If stringer beads aren't clicking, you go back to dry arcs. Each step has to be solid before you build on it.
This isn't about slowing you down. It's about making sure that when the penetration does come, it comes because everything underneath it is aligned, not because you got lucky with the amps.
Quick recap: the progression
- Dry arc exercise: master heat control with no filler
- Stringer beads: introduce filler and dial in consistency
- Butt joints: apply to a real joint, start thick then go thin
- Etch test if needed: cut cross-sections to check your fusion depth
- If something's off: drop back to the previous checkpoint and dial it in
Final thoughts
Penetration will come when all steps are aligned. Stop looking at the back side and start fixing what you can see on the front. Clean edges, consistent puddle, proper filler - get those locked in, and penetration follows on its own.
If you're ready to follow this progression step by step with full exercises, a PDF textbook, and video lessons, that's exactly what's inside my programs.
Fill & Chill
Dusty
A different kind of ghost penetration

Download your exclusive Beginner's Guide to Aluminum TIG Welding!
Enter your information below to receive exclusive PDF mini-textbook straight to your email.
We hate SPAM. We will never sell your information, for any reason.
