
Why Some of the Cleanest TIG Welds Are Actually the Weakest
The Pretty Weld That Failed
Did you know that some of the cleanest TIG welding I've ever seen has also been some of the weakest?
It's one of the most common traps in TIG welding, and most beginners (and plenty of experienced welders too) walk right into it. You run a fillet joint, lay in your filler nice and even, the bead looks textbook and exactly the kind of thing people throw on Instagram and rack up the likes.
But once the part cools down, the real test starts.
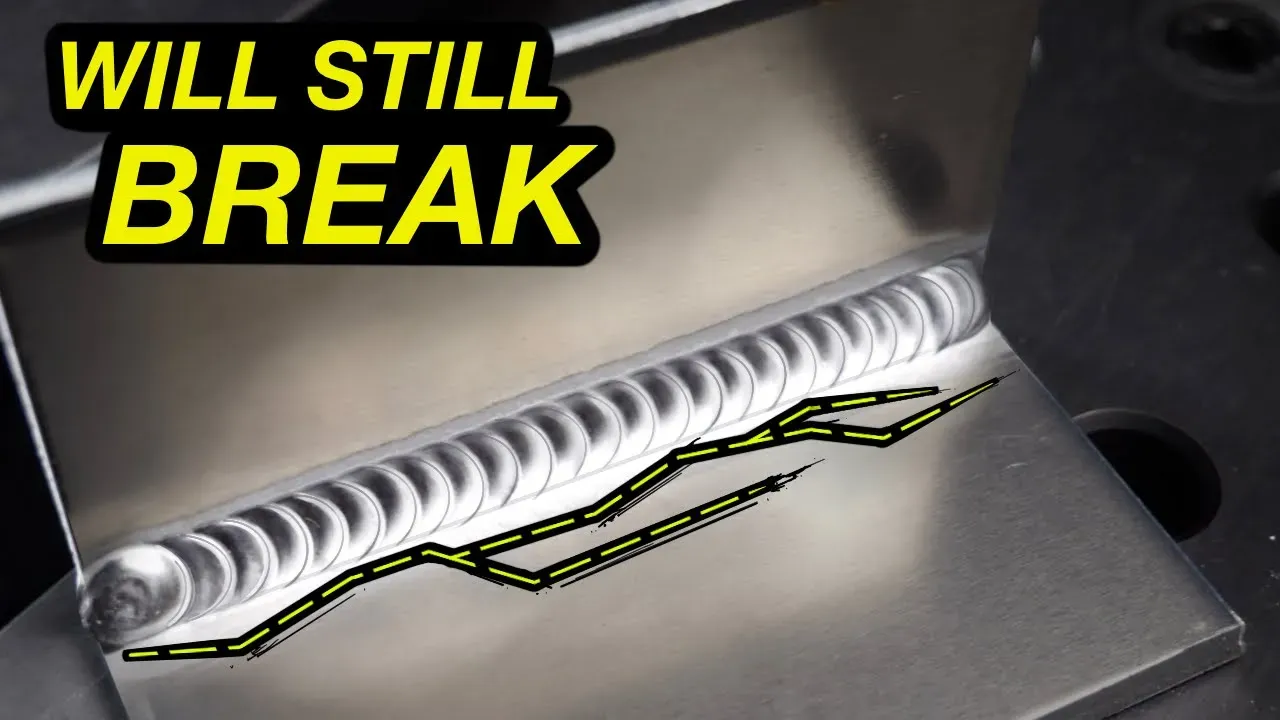
I cut a score line along the welding pass with my band saw, set the two pieces up to be bent apart, and gave it a few solid hits. That's called a fillet break test; it's one of the fastest ways to find out whether your weld is actually fused into the base material or just sitting on the surface like paint.
You ready for it? Cracked it open and... nothing. No penetration. Real-world situation, that's an immediate fail. Too bad, because that weld actually looked pretty good.
Appearance vs. Actual Strength
That weld was a classic case of appearance over structural strength. The majority of the welding was sitting on the surface of the joint with zero penetration down into the base material.
Honestly, this is a message more welders need to hear.
As much as I love social media, I think it's done a pretty terrible job of giving welding the right context. So many welds online look amazing on a phone screen but would fail catastrophically in the real world. A lot of beginners stress out that their welds don't look like what they see online — when in reality, lack of penetration is extremely common, even on the welds that go viral.
Everybody's chasing the perfect-looking weld. Almost nobody's checking the inside.
So if good-looking welds can still fail, how do you actually get good, full penetration?
The Five Fundamentals of Real Penetration
1. Arc Focus
The first thing I teach my students before they ever learn how to tack weld is arc focus: how to keep the heat focused strategically into the joint exactly where you want it.
This is more important than the settings programmed into your machine. Hot take - I said it.
Arc focus is what actually sinks the heat into the joint and gets you proper fusion. Combine that with the right settings and the right filler material, and you've got the foundation of a sound weld that'll pass a test.
2. Joint Preparation
A lot of welders hear "joint prep" and immediately tune out because "Yeah, yeah, I got it." But I've seen joints put together that I can guarantee are going to fail before the welder even arcs up.
Here's what good prep looks like:
- File and deburr every edge of the plate
- Wipe the joint down with acetone, multiple times, to fully decontaminate (this is what every testing centre I've been through expects)
- Check the fit-up of the joint until it's dead even
If your plates are misaligned, you'll end up with inconsistent penetration. If there's any overlap in the fit-up, you might get no penetration at all. Even with perfect technique and perfect settings, sloppy prep will fail you before you start.
3. Adequate Heat Input
Obvious one, but worth saying: if your amperage is too low, you're not going to get good fusion into the joint. Period.
4. Standoff Distance
Standoff distance is the gap between the tip of your tungsten and the workpiece. Get in nice and close, the arc cone becomes narrower and more focused, which means you can aim the heat exactly into the area that needs penetration.
This goes for every joint configuration you'll weld.
5. Travel Speed
Don't buzz along. If you're moving too fast, the heat doesn't have time to build up into the base material, and fusion ends up incomplete, even with perfect settings and perfect technique.
The Most Overlooked Detail: The Start
Here's the thing nobody talks about enough: the start of the weld is where everything is established.
Your workpiece is cool at the start and heats up as you travel. If you rush the start, you'll never get penetration on that first stretch and you'll be playing catch-up the whole way down the joint.
What to do:
- Give yourself extra time at the start
- Get the puddle, filler, and fusion blended in before you start moving
- Watch for the edges of your puddle to establish, then begin your travel
- Once the piece heats up, you can move at a normal, moderate pace
- Just don't overheat at the end
Look at the backside of a weld done right and you'll see the penetration starts right at the beginning and stays consistent through the entire joint. That's the goal.
Inspection Tests That Show the Truth
You can't trust your eyes on the top of a weld. You have to check the inside. Two tests I use all the time:
Fillet break test — score the weld with a band saw, bend or hammer the pieces apart, and inspect the inside for penetration and fusion. Fast and brutal, but it gives you the truth.
Knick break test — typically done on a butt joint with a groove preparation. Weld it out, cut score marks into the edges of the coupon, fix it in a vise, and break it with a hammer. The break face shows you everything: penetration, fusion, porosity, slag inclusions, the lot.
Pretty welds are easy. The real payoff is when something looks good on the surface and holds up on the inside.
Catch you in the shop,
Dusty
Download your exclusive Beginner's Guide to Aluminum TIG Welding!
Enter your information below to receive exclusive PDF mini-textbook straight to your email.
We hate SPAM. We will never sell your information, for any reason.
