
Why Is My TIG Weld Contaminated? How To TIG Weld Steel
Why is My TIG Weld Contaminated? (And How to Fix It)
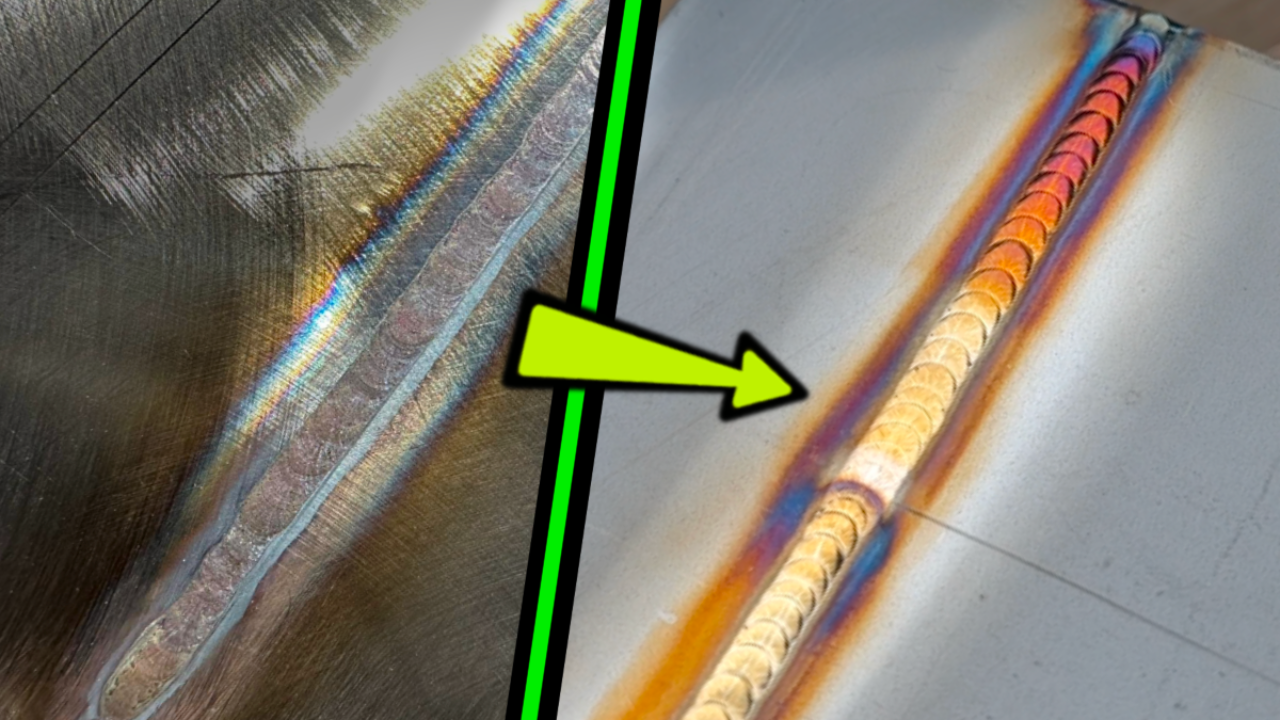
Nothing’s more frustrating than laying down a TIG weld and watching it go to hell because of contamination. That dull, crusty mess that wrecks your bead and your mood? I remember those days so well... But the good news is—it’s almost always something you can control, and then avoid completely.
Let’s break down the main reasons your TIG welds are getting contaminated and exactly how to clean them up.
1. Dirty Base Material = Dirty Weld
This is the #1 culprit, and it’s more common than people think. When you get your practice material to start welding on, during the cutting process there will always be cross-contamination with other metals. The cutting blade, shear, or saw has most likely seen some action with other metals, so these will all contribute to contaminating your brand new practice coupons in some way. Same goes for grease, oil, and even fingerprint smudges. If your base metal isn’t spotless, your weld won’t be either.
What to do:
-
Decontaminate with acetone (not brake cleaner, unless you like danger)
-
Use a dedicated stainless wire brush—only for whatever metal you're welding
-
Don’t touch the cleaned edge with your fingers—oil matters
Clean metal equals clean puddles. Don’t skip this.
2. Tungsten Contamination
If you’ve dipped your tungsten—even a little—you’ve introduced foreign material into the weld. Contaminated tungsten will create a messy arc and ugly, erratic puddles. A lot of people just tough it out and carry on, but even that tiny, quick dip is now introducing foreign materials into your puddle. And not to mention that the tip of the electrode is now compromised and the puddle is going to behave like a drunken college kid.
What to do:
-
Regrind the tungsten prep, or replace your tungsten if it’s been dipped
-
Use a grinding wheel only for tungsten
-
Keep your tungsten sharp and with a smooth grinding finish.
It’s wild how many issues trace back to the tungsten. Grind and prep a handful, and when you have a touchdown or even the tiniest dip, just swap it out for a fresh one. I have a ZERO tolerance policy for my electrodes no matter what type of base material I'm welding. Just stop and grab a fresh one, swap it out, it takes literally 10 seconds.
3. Shielding Gas Issues
No gas, bad gas, or wrong gas flow? Welcome to headache central. Even with the cleanest prep and perfect fit up, with a poorly set gas volume your puddle will be wobbling all over the place. Shielding gas protects your weld pool from the atmosphere, and its also a MAJOR factor in puddle stability. Especially with Stainless Steel or even other more finicky metals such as Titanium.
There is a video lesson that will cover these settings in much more detail, CHECK OUT THE LESSON HERE.
Get Your Gas Settings Dialled In:
-
Check your flow rate (This changes in relation to cup size you're using)
-
Make sure your torch is sealed tight—no leaks
-
Don’t weld in a breeze or near fans—it blows away your shield
-
Use 100% argon for TIG (don’t try to get fancy)
You want that weld pool under a clean, protective bubble. Without it, the weld will look like someone sprinkled sugar on it.
4. Welding Technique & Settings
Too much heat, poor travel speed, and inconsistent arc length can all contribute to contamination. Even if your prep is perfect, your technique can wreck it.
What to do:
-
Keep a tight arc length—I recommend a distance approximately equal to the thickness of your tungsten electrode. For example 3/32" (2.4mm) tungsten thickness, a standoff or arc length EQUAL to this thickness.
-
Don’t hover or pause too long in one spot
-
Use a foot pedal to stay in control of your amperage
-
Set your balance properly (especially for thin material.)
Dial in your machine, keep your hand steady, and watch the puddle like a hawk.
5. Contaminated Filler Rod
Here’s one most beginners miss—your filler rod can carry just as much junk as the base metal. If it’s oxidized, covered in shop dust, or touched by dirty fingers, it’s bringing that right into your weld.
What to do:
-
Wipe it clean with acetone
-
Store it in a clean tube or container
-
Never let it drag on the bench or sit uncovered
Wipe it with a clean white rag and have a look after you decontaminate, you'll be horrified at what you see on the cloth. Keep it clean.
Final Thoughts
TIG welding is unforgiving when it comes to contamination. But once you know what to look for—and build better habits—it becomes second nature. Clean prep, steady hands, and the right settings can turn your welds from sketchy to pro-level real fast. If you're more of a visual learner, Check Out The Video Here.
Fill and Chill,
Dusty.
Download your exclusive Beginner's Guide to Aluminum TIG Welding!
Enter your information below to receive exclusive PDF mini-textbook straight to your email.
We hate SPAM. We will never sell your information, for any reason.
