
TIG Weld Like a Machine: 5 Tips That Actually Work
A lot of people chase better TIG welds by constantly changing settings. They tweak amps, mess with balance, change frequency… and the weld still comes out too hot, too cold, or just inconsistent.
That’s because settings don’t run the puddle...You do!
These five tips change your results fast because they focus on what actually controls the weld in real time. Your filler use, heat control, body position, and how you approach the weld from the start are all factors to focus on to maintain consistency. They’re simple, practical tips, and you’ll see the difference straight away.
Why these tips show improvement immediately:
Most TIG indications live on the machine panel. Charts, numbers, rules of thumb. Those all matter, but it’s rarely the main issue.
The real problem is control.
The weld doesn’t stay the same from start to finish. The joint heats up, your hands tense, travel speed drifts. The puddle starts growing and suddenly you’re reacting instead of leading. That’s when aluminum feels like it takes off on you.
These tips fix that part:
What makes these tips different
There’s a theme running through all five tips. You’re not locking yourself into one “perfect” setup and you’re building habits that let you adjust without panicking.
That usually shows up as:
-
Cleaner starts
-
Smoother edges that actually blend
-
Better control as heat builds through the part
Why aluminum makes this obvious fast
Aluminim dumps heat into the base metal quickly. If your control is off, it doesn’t stay hidden for long. The weld will tell you immediately.
That’s why these tips feel instant; fix the cause, and the weld stops fighting you.
Tip 1: Use filler as a control tool
Filler rod isn’t just there to add metal. It’s one of your best tools for managing heat.
If you don’t feed enough filler, the base metal keeps soaking up heat and the puddle spreads. Even with good settings, your weld can overheat fast.
Too much filler causes the opposite problem. The weld sits up, the edges don’t wash in, and you get that harsh, raised look. No "blendy-blendy".
The goal is balanced reinforcement. Enough to support the joint but not so much that it blocks tie-in.
Think of filler like a thermostat in your hands: too little and things run away, too much and nothing blends.
This matters even more near the end of a weld when heat has built across the whole piece.
Tip 2: Stop obsessing over amperage
TIG isn’t a math problem.
The weld wants different heat at different moments. The start is cold, the joint warms up, your angle changes, travel speed changes and then the puddle reacts.
So if you set your machine for one moment, you’ll still be adjusting while you weld.
A simple approach is setting the panel about 15–20 amps higher than you think you need. That gives you room to work.
With a foot pedal, you can hit the heat early, establish the puddle, then back off as the joint warms up. Even without a pedal, the idea is the same. Watch the puddle, not the number.
Tip 3: Fix your hand support
A shaky bead isn’t always lack of skill. Sometimes it’s how you’re supported.
Anchoring the butt of your hand feels stable, but it limits movement. You run out of room, your wrist twists, arc length changes, and the bead wanders.
Supporting the mid-forearm gives you a bigger comfort zone. Smoother movement, fewer jumps, more consistency.
That consistency shows up as tighter spacing and steadier control.
Tip 4: Win the first inch
The first inch sets the whole weld.
The product overall is cooler and the puddle is easier to control. This is where you lock in puddle size, filler rhythm, and travel speed.
A lot of people rush this. The puddle flashes up and they take off too fast! The weld never settles and they spend the rest of the pass trying to recover.
Get into the heat early, establish the puddle properly, then move. If the first inch looks right, the rest is mostly repetition.
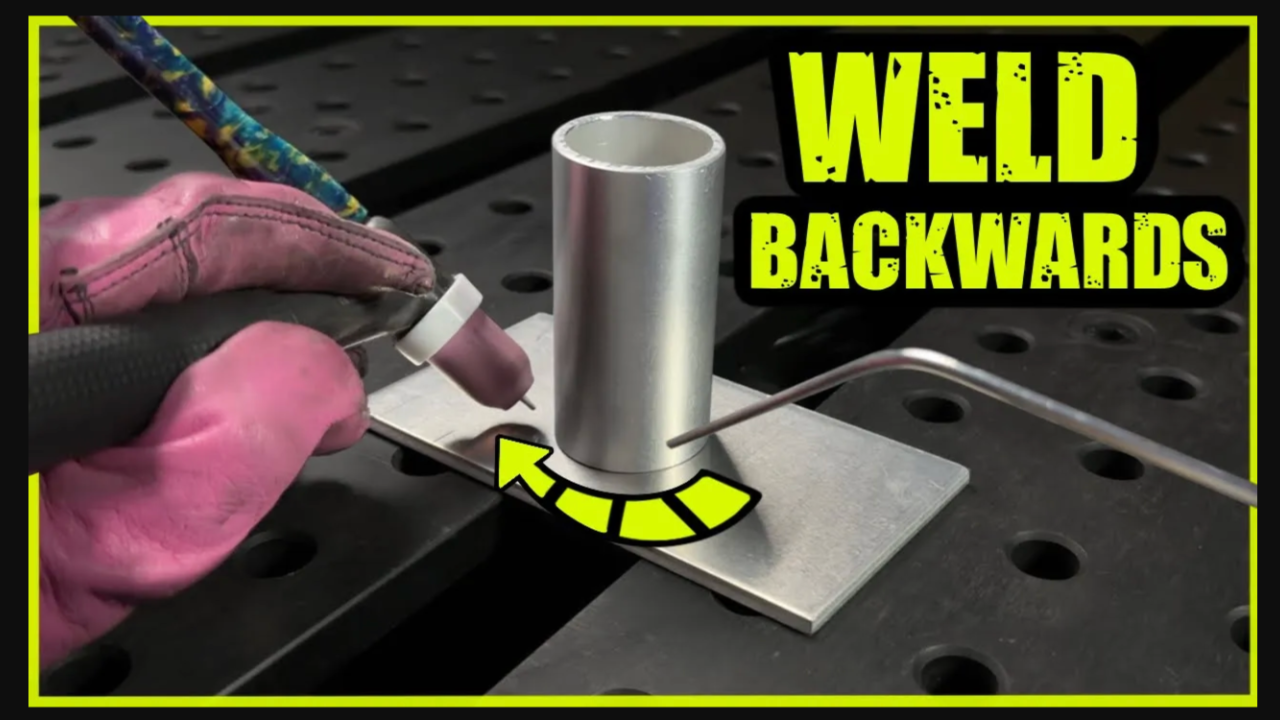
Tip 5: Plan your weld direction
Pros don’t just start welding anywhere - they plan ahead.
Weld direction matters because of heat buildup. On aluminum especially, welding toward open edges late in the pass can stack heat fast.
Sometimes flipping direction or knocking out certain passes earlier makes a massive difference. Planning often improves results more than changing machine settings.
Final thoughts
If you only change one thing, treat filler like a control tool, not an afterthought!
Pair that with smart heat control, better support, a solid first inch, and planned weld direction, and your welds will start cleaning up fast.
Try these on your next practice piece and watch what improves first.
Fill and chill.
Download your exclusive Beginner's Guide to Aluminum TIG Welding!
Enter your information below to receive exclusive PDF mini-textbook straight to your email.
We hate SPAM. We will never sell your information, for any reason.
