
Mastering Stainless Steel TIG Welding
Let’s face it—TIG welding stainless steel can be a bit of a mystery, especially when you’re just getting started. One of the most common questions I get every time I post a photo on Instagram is: “Dusty, what settings did you use?”
Sounds simple, right? But here’s the truth: what works for me might not work for you. There are way too many variables—your machine, joint type, welding position, even filler material size. What worked perfectly for me on an outside corner weld might not do the trick at all on a tight fillet or vertical joint.
So instead of tossing out numbers that won’t help, let me show you how to actually dial in your setup for stainless TIG.
Amperage: Get It Just Right
Amperage is basically your heat input you use to weld your base material. Too little and your welds don’t fuse right. Too much and you’re melting everything in sight. But instead of obsessing over a perfect number, do this:
If you’ve got a foot pedal or slider, you’re golden. Set your max amperage 10-20 amps higher than you think you’ll need, then control it live while welding.
Here’s why: If you set it too low and can’t reach the heat you need mid-pass, you’re stuck. But if you set it slightly high and control it carefully, you can always back off. You'll want to hit the start of each pass with good heat, so if you have an insufficient amount you're not going anywhere fast. A touch extra heat has you ready to go in much faster shape, don't be shy.
Keep an eye on the puddle:
-
If the filler metal doesn’t blend smoothly? Bump the amps up.
-
If the weld is sunken or hollow? Dial it back.
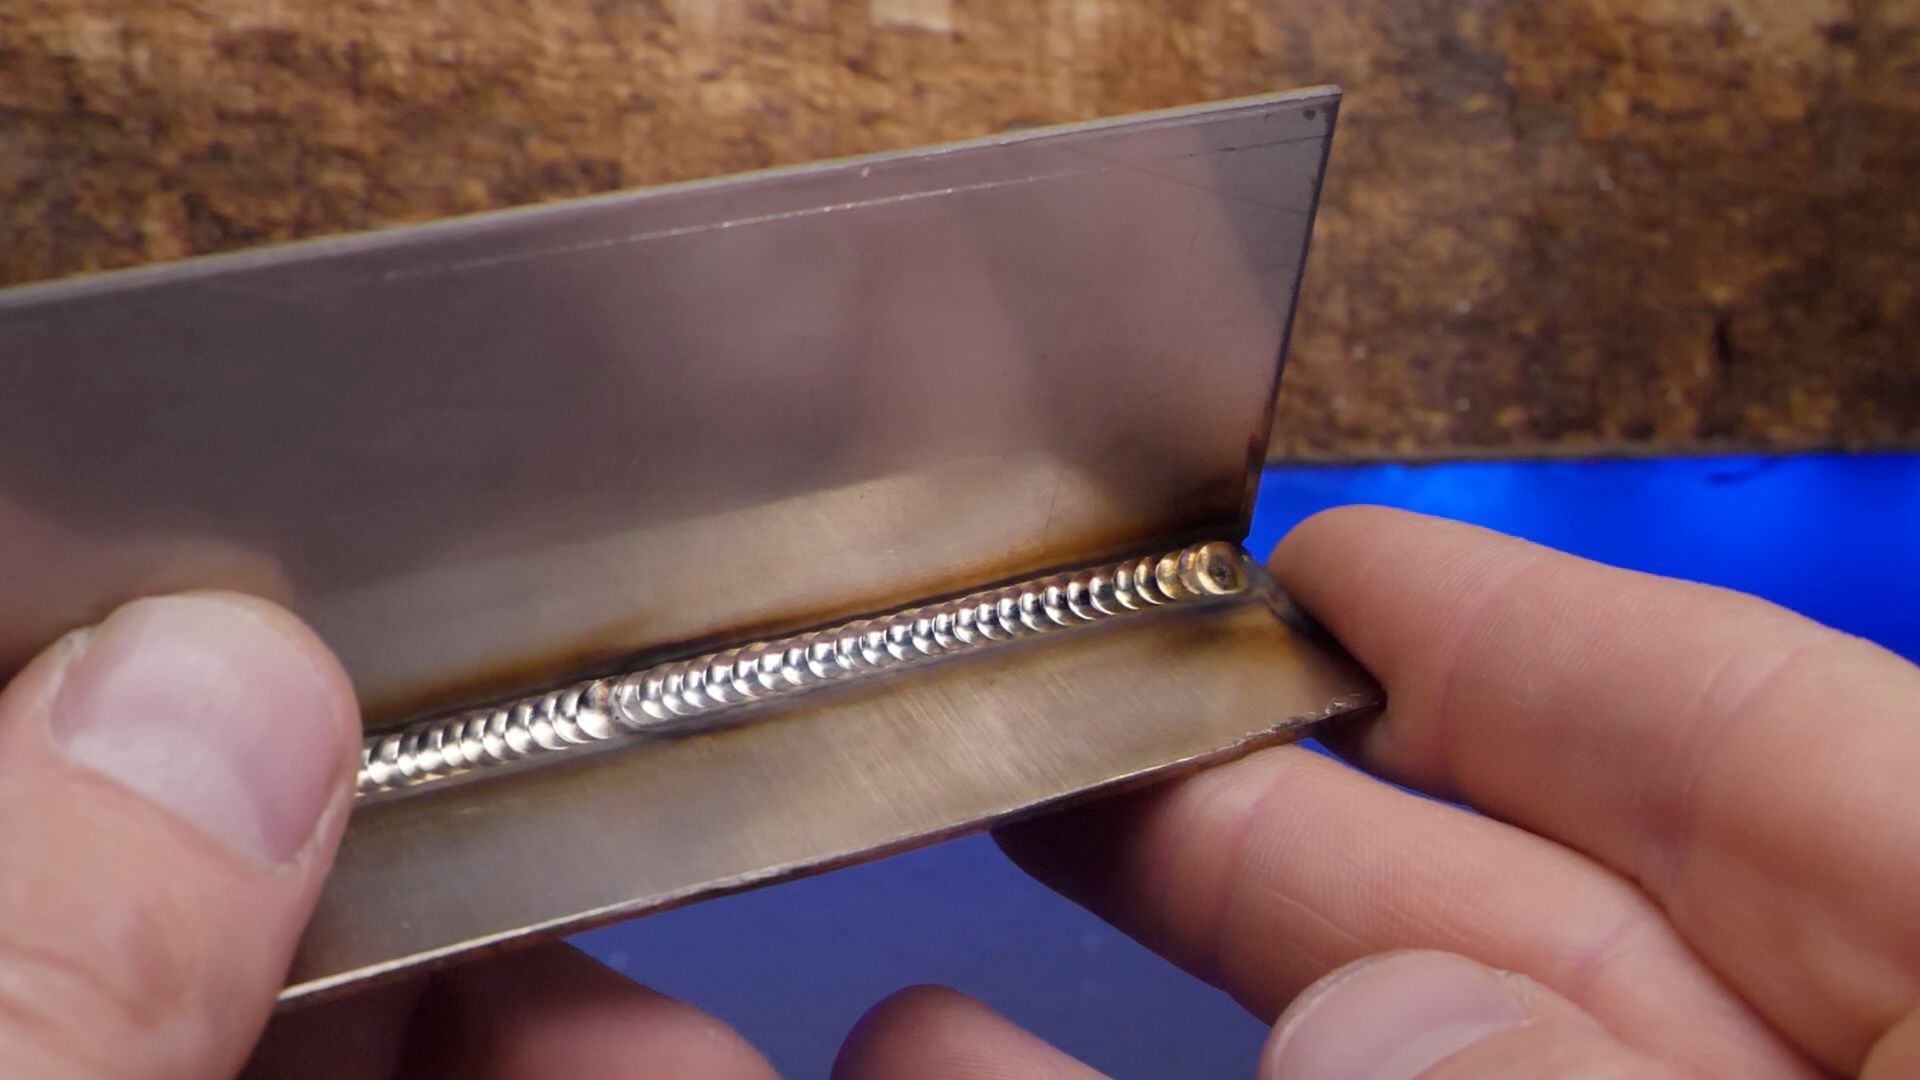
The goal: smooth transitions between filler material and base material and narrow, consistent heat-affected zones (HAZ).
Post Flow: The Underrated Secret
Post flow is how long your shielding gas runs after the arc stops. With stainless, this setting REALLY MATTERS. That red-hot weld is begging to become oxidized. If you pull your torch away too early, boom—you get that crusty gray mess.
Here’s the fix:
-
Stay put when you finish.
-
Let the gas run until the glow is gone plus a few seconds.
-
Keep your filler rod tip in the gas shield too.
Oxidized filler tips = contaminated starts on your next pass. Prevent it with proper post flow and good torch discipline. Don’t move until the gas is done.
Gas Flow: Match It to Your Cup
This one gets ignored way too often. If your gas flow doesn't match your cup size, your arc control and coverage go out the window.
Let’s say you’re running 35 CFH on a #15 cup with a diffuser—beautiful, smooth coverage. Now take that same 35 CFH and run it through a #8 cup? Your arc will go wild and your puddle will be pushed around like a sail in a windstorm.
General rule:
-
Bigger cup = more gas.
-
Smaller cup = less gas.
Use a diffuser (like the ones from Edge Welding Supply) to keep the gas calm and even. If your weld puddle is dancing around, chances are your gas is too high or your cup is too small.
The Wrap Up
Don’t overcomplicate your settings. Focus on these three:
-
Amperage: Set it a bit high, control with a foot pedal.
-
Post Flow: Protect your tungsten and weld by staying put until the glow fades.
-
Gas Flow: Pair your cup size with the right gas volume for smooth, clean coverage.
Want to watch the full lesson? 👉 Watch Here
Do a random act of kindness for a stranger today.
My name’s Dusty James, Talk soon. Peace!
Download your exclusive Beginner's Guide to Aluminum TIG Welding!
Enter your information below to receive exclusive PDF mini-textbook straight to your email.
We hate SPAM. We will never sell your information, for any reason.
