How to Get Better at TIG Welding Aluminum
Aluminum doesn't lie. The moment your heat or filler is off, the weld will tell you and it doesn't shy away from highlighting problems.
That's what makes aluminum both frustrating and one of the best teachers you'll ever have. Every mistake shows up immediately, which means every correction sticks. The key is building your skill in layers so that by the time you're fighting awkward angles on a real job, your fundamentals are locked in tight.
Here's the progression that actually works.
Start With Flat Plate, Not a Project
This first step is plain on purpose.
Grab a flat piece of aluminum plate, no joint, no setup, nothing to track. Just run a bead. That simplicity lets you focus entirely on the core skill, matching your heat to the material thickness and feeding filler at the right pace.
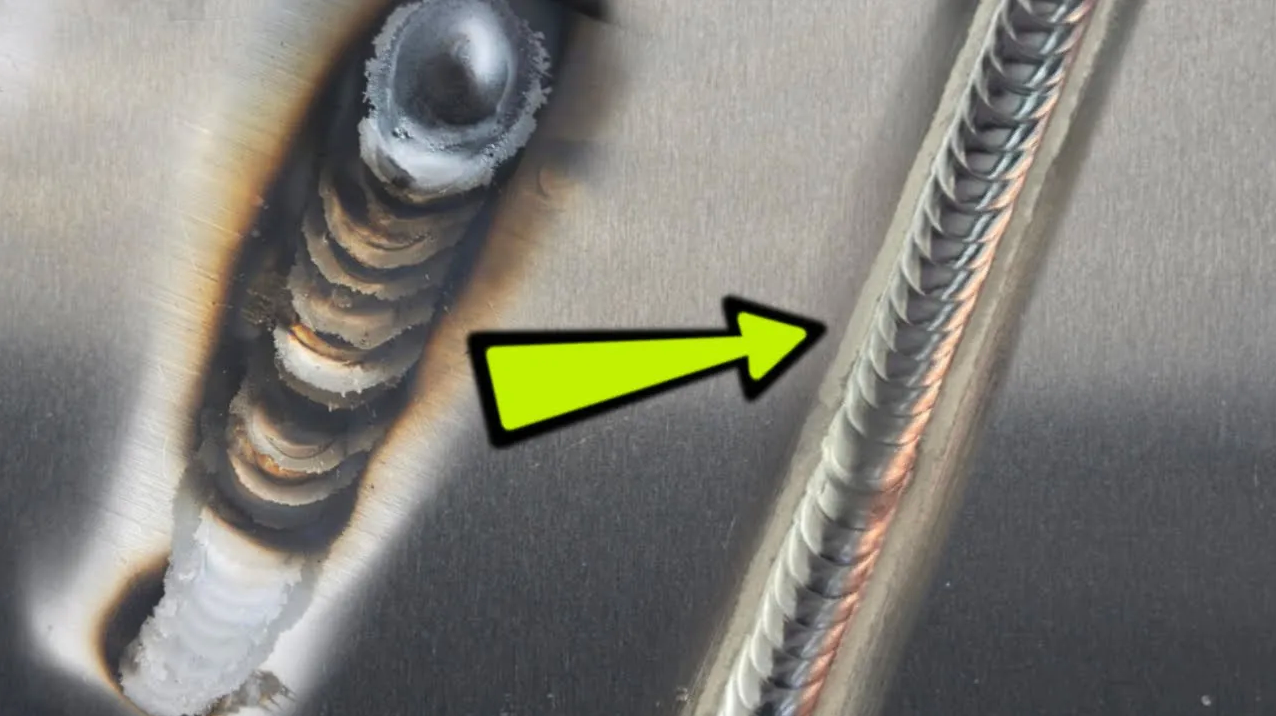
When that balance is dialled in, everything feels calm. The puddle becomes predictable, the bead stays even from start to finish, and the cleaning action around it - that neat, bright zone - looks consistent and controlled.
On aluminum, that visual feedback is everything. It's your first signal that the weld is actually under control and not just holding together by luck.
If the bead isn't even on flat plate, the joint won't fix the problem.
Don't rush past this step. Stay here until flat runs feel repeatable, not just possible.
Move to a Joint and Look for Penetration
Once flat plate feels steady, move to an actual joint.
Now you're tracking a seam instead of floating across open plate, which adds difficulty but it shouldn't change your standard. The same visual discipline applies. Consistent bead, even cleaning action, steady filler timing. The joint is harder, but the rules are identical.
One thing to watch for: if the base material isn't too thick, you may start to see a faint line of penetration on the back side of the joint. That backside trace is a good sign. It means the heat was sufficient and the weld tied in properly. It feels a little magical the first time you spot it but it comes straight from the same basics you've already been drilling on flat plate.
Work a few different joint configurations until they stop feeling awkward. At that point, your confidence is built on real control, not guesswork.
Use Scrap to Mimic Real Work
This is where practice starts to feel like fabrication.
Take scrap pieces - even simple triangles - and tack them into random configurations. Start with open, easy setups that give you clear sight lines, then progressively make things worse. Tighter angles. Awkward corners. A cramped little cluster where nothing sits flat and you're peeking around your own hands to see the puddle.
That's real welding. And no amount of flat plate practice fully prepares you for it.
Here's a simple progression to follow:
Step 1: Open, easy scrap shapes with clean sight lines and comfortable torch angles.
Step 2: Tighter angles and corners that make positioning less natural.
Step 3: A more complicated cluster where access is restricted and nothing sits level.
Each step forces you to carry your fundamentals into a messier environment. The heat still has to match the thickness. The filler still has to match the puddle. The difference is that your body position, hand placement, and view of the joint are less forgiving...and that's exactly the point.
This kind of practice is what turns polished bench skills into real-world skill. The more often you do it, the faster your aluminum welding improves.
The Takeaway
Flat plate first. Joints next. Then awkward scrap assemblies that force you to adapt.
That's the ladder. Climb it one rung at a time, and the harder setups stop looking like a different craft, they start looking like an extension of everything you've already built.
Aluminum stops feeling mysterious when you treat practice with intention. Stay in each stage long enough to build real control, and the material that used to punish every mistake starts working with you instead of against you.
Download your exclusive Beginner's Guide to Aluminum TIG Welding!
Enter your information below to receive exclusive PDF mini-textbook straight to your email.
We hate SPAM. We will never sell your information, for any reason.