
BUSTING Bad Welds Found In The Gym
Real-World Welds: Spotting Mistakes in the Wild
Everywhere I go, I’m checking out welds. Even on vacation.
While I was on a family trip in Penticton, BC, I found myself hitting a local gym—and couldn’t help but start analyzing the welds on some of the equipment. What I found was equal parts impressive and... infuriating.
Let’s dive into what I saw, why it matters, and what it can teach you about your own TIG welding, especially if you’re working on aluminum, pipe welds, or even gym equipment like this.
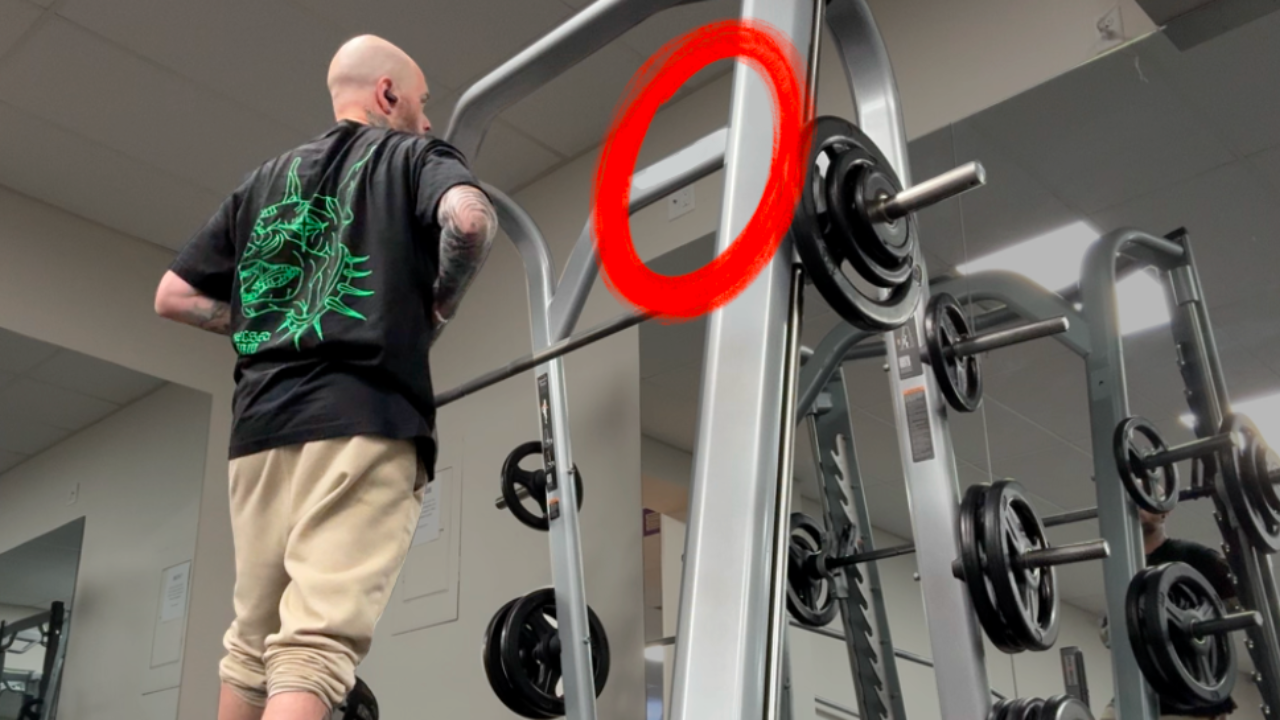
The Undercut Flaw
On a squat machine, one joint stood out. Zooming in, you can clearly see undercut—where the weld didn’t properly fuse to the top edge, creating a hollow ridge. Most likely, this fillet joint was welded while the piece was standing on end, with the profile of this weld being affected by gravity and poor technique. This type of flaw can come from bad torch angles, incorrect machine settings, or inconsistent travel speed.
Weld profile matters. We want filler centered between both base materials. I cover this in my free TIG welding workbook—link below—and it’s easier to fix than you think, especially if you learn to weld a 45° fillet before jumping into 90° joints.
Poor Post-Weld Cleanup
Next issue? Spatter everywhere.
Seriously, this takes two minutes with a chipping hammer or angle grinder. Leaving sharp burrs and slag on structural components not only looks bad, it’s a hazard. Especially once painted, the flaws stand out like a sore thumb.
Connection & Tie-In Mistakes
Several machines had great welds—but the connections were incomplete. Instead of joining overlapping welds, they just stopped short. This weakens the joint and invites corrosion. In a sweaty gym full of humidity, that matters. Use the start of your pass as the tie-in point for the next—it’s simple planning.
Razor-Sharp Cutouts
Here’s where I almost lost it. I ran my fingers along a laser-cut hole on a piece of equipment and almost came away with broken skin. The burrs left on this were brutal. Clean your cuts. Use a deburring tool, file, or a sliced Scotch-Brite disc. It takes seconds. I demonstrate this in detail in the video lesson, hit the link to watch and follow along.
No Weld at All?
On one support bracket, I found two stitch welds—and a giant unwelded gap in the middle. Structurally, this is a big miss. Always wrap corners fully or add a heat break (like a corner wrap tack) to finish your passes completely. I show exactly how to do this in a new drill I love using—check out the example in the blog.
When Things Go Right
Now, credit where credit is due—some of these welds were fire. Clean tie-ins, mirrored pass directions, beautiful pipe wraps. Seeing this proves how good things can look when you plan properly.
One standout: a pipe welded on an extreme angle. That’s tough. But if you prep, set up a long travel pass, and use tricks like increased gas flow and tungsten stick-out, it can be done flawlessly.
Pro Tip: Practice around standard 90° pipe first, then move on to angled cuts. Consistency is key.
If you want to see this full breakdown with visuals, plus learn how I tackle these exact issues in my own shop, you need to watch the full episode here:
Thanks for reading.
Fill and chill,
Dusty James
Download your exclusive Beginner's Guide to Aluminum TIG Welding!
Enter your information below to receive exclusive PDF mini-textbook straight to your email.
We hate SPAM. We will never sell your information, for any reason.
