
How To TIG Weld Aluminum In 3 Hours
How to TIG Weld Aluminum in 3 Hours
Learning how to TIG weld aluminum doesn’t have to take weeks or months. If you follow the right steps, get your setup dialed in, and stay focused, you can start laying solid beads in just a few hours.
I’ve taught a lot of people how to weld aluminum over the years. Most of them think it’s way harder than it actually is. But with a smart plan, and a little grit, you can absolutely get aluminum dialed in fast.
Here’s how I recommend you approach it. This is the same structure I use in my online TIG programs—and it works.
Hour 1: Dial In Your Setup
Aluminum TIG welding is all about setup. If your machine isn’t dialed in, you're already fighting an uphill battle.
Here’s what you need to have in place:
-
AC Mode on your TIG machine
-
1/8” tungsten (2% lanthanated or Ceriated is a great choice)
-
1/8” filler rod (ER-5356 is a great starting point)
-
100% Argon shielding gas
-
Gas flow at 15 CFH
-
#5-8 or cup size (#8 cups will require a gas lens.)
-
AC balance around 70–75% EN
-
Post flow around 6-8 seconds minimum
Also, clean your metal. Wipe it with acetone. Then use a stainless wire brush dedicated only to aluminum.
Your goal for hour one: Get a clean, stable arc, and test your settings on scrap. Focus on holding a tight arc length and watching the puddle form. Don't add filler yet—just get comfortable running the established puddle along a line and extinguishing properly. I call this the Dry Arc.
Hour 2: Fill and Chill Practice
If everything from hour 1 went well, now it’s time to start adding filler, this is an exercise known as the "Stringer Bead." It's just welding passes on flat plate to practice this next step.
The biggest beginner mistake? Waiting too long to add filler. That’s when burn-through happens. You need to learn my method: Fill and Chill.
Here’s the move:
-
Arc on.
-
Add a couple dabs of filler right away.
-
Pause. Let the puddle settle.
-
Then continue your weld, adding filler consistently.
This approach at the start regulates heat and gives your weld a strong start. It also prevents that molten crater you get when the base metal overheats.
During this hour, focus on:
-
Clean starts.
-
Consistent filler rhythm and 'Stepping Distance.'
-
Watching your puddle width along the length of the welding pass.
Work with 1/8” aluminum coupons. Stick with passes on flat plate. (**Notice how we haven't added any actual joint configurations yet?**) That’ll give you the clearest view of your puddle and the best surface to learn control.
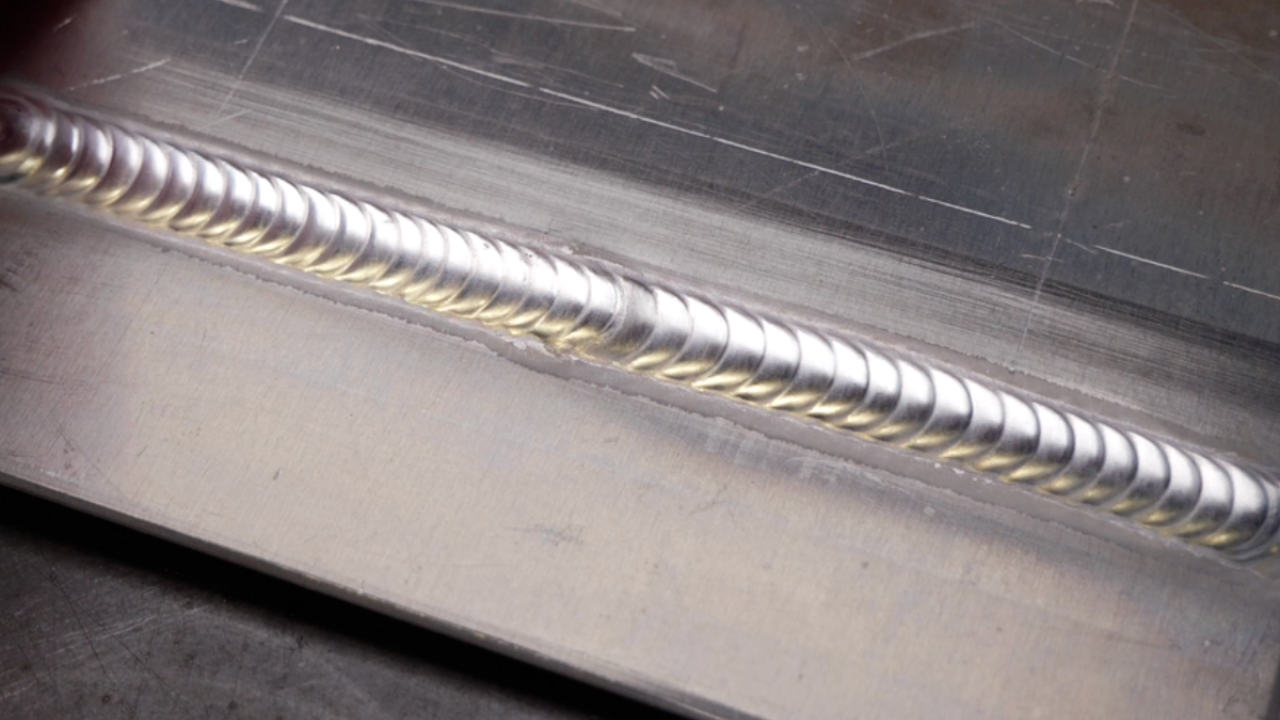
Hour 3: Run Real Beads on a Real Joint
Now you’re warmed up. Time to push it further.
Try:
-
The Butt Joint
Focus on keeping your puddle controlled and your consistency bang on from start to finish, just like you did with the last practice exercise of the Stringer Bead. Aluminum moves fast once it heats up, so you need to be ready to control the heat with your pedal now that you're running over an actual welding joint.
If it starts to get too hot:
-
Back off the pedal
-
Add filler more frequently
-
Speed up your travel
Every time you finish a pass, stay still. Let that post flow do its job. Then check your weld.
Is the finish of the weld shiny with good cleaning action? Good. Is your tungsten still clean? Perfect.
You’re building muscle memory now. You’re learning how aluminum reacts—and how to stay ahead of it.
Want to See It Done Step-by-Step?
I cover this entire 3-hour aluminum welding structure in this Video Lesson: 👉 How to TIG Weld Aluminum in 3 Hours
Watch me break it all down. Torch angles, filler moves, amperage control—the whole deal. You’ll see exactly how I teach it in my full programs on my website.
You don’t need a fancy shop or years of experience to master aluminum TIG.
You just need a solid plan, a few hours, and the right guidance.
Let’s get it.
Download your exclusive Beginner's Guide to Aluminum TIG Welding!
Enter your information below to receive exclusive PDF mini-textbook straight to your email.
We hate SPAM. We will never sell your information, for any reason.
