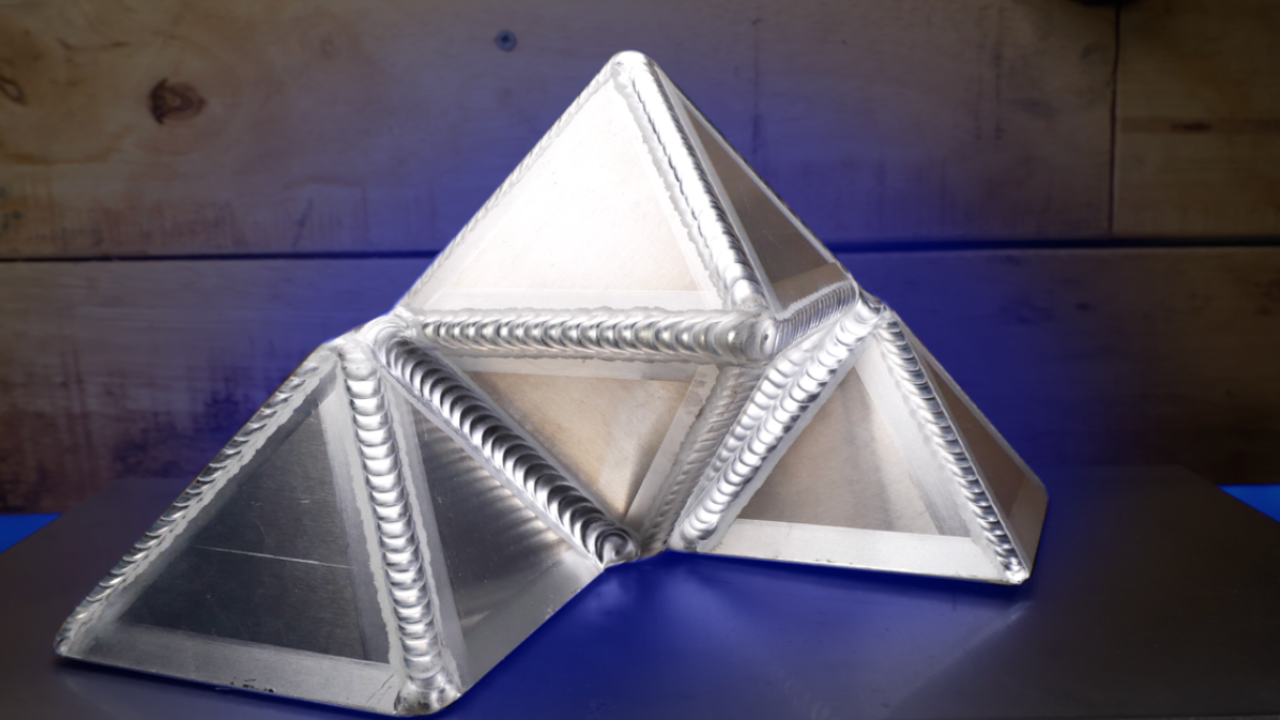
How to TIG Weld a Pyramid Joint and Fun Aluminum TIG Welding Practice
How to TIG Weld a Pyramid Joint (Aluminum Practice Plate Project)
If you think welding basic practice plates are boring, you’re about to change your mind. In this project, we’re taking a plain 1/8" aluminum coupon and turning it into a seriously fun challenge, one that will test your fit-up, consistency, and heat control while giving you something awesome to look at when it’s done.
This build uses 3.2 mm aluminum plates, cut into 16 identical triangles. Don’t stress too much about having the exact same alloy; as long as you’re close, you’re good. The real goal here is accuracy. Every side of each triangle needs to be the same length so your fit-up is tight later on. I use a bandsaw with a little cutting fluid to keep the blade cool and the lines clean. The straighter your cuts, the easier your assembly will be down the line.
Prep Like a Pro
Once the triangles are cut, hit each edge on a fine-grit belt sander to smooth out any saw marks. You’re not trying to reshape anything here, you just want every piece uniform. Then it’s time to clean.
If you’ve followed my videos before, you know I’m obsessive about decontamination. Start with lacquer thinner to remove deep grime and oil. Wipe until your rag stops picking up dirt - you’ll be surprised how much is on there. Next, wire brush every single edge. I use a ruler to keep my lines neat and consistent, which helps the welds look clean later. After that, go over everything again with acetone. Yes, twice. Even after all that prep, your rag will still pull up residue.
And don’t forget your filler rods - clean them too. It’s one of the easiest things to overlook but makes a big difference in arc stability and weld appearance.
Tacking and Assembly
For this project, I used my Everlast Typhoon 230, a killer machine that’s been in my shop for a couple of years now. I start by tacking the small pyramids first, then the diamond-shaped middle section. Always place tacks where your welds will start or stop, never in the middle of a pass. This keeps your final welds smooth and consistent.
Use a square to check your angles and make small adjustments as you go. Getting things straight early makes the final assembly a lot less painful.
Welding the Pyramids
Now it’s time to weld out the first two pyramids. These are outside-corner joints, so filler control is everything. You don’t want to overfill and end up with fat beads, but you also don’t want underfill that leaves valleys. Watch your stepping distance and keep it consistent across the whole pass.
As you reach the end of each joint, back off the heat slightly and add a little more filler. That’ll help prevent overheating and distortion near the tips. Between passes, cool your pieces down — I dunk them in water and rotate between pyramids to avoid overheating one part.
Building the Diamond
The diamond section follows the same steps: start clean, stay comfortable, and keep your welds consistent. The goal is to connect every pass perfectly with no gaps. Plan your direction so all your welds finish in the same area, and tie it all together with a neat final dab.
Here’s a tip: if you’re sealing a closed section like this, drill a small weep hole before your last weld. It vents the hot air inside so you don’t get blowback or gas flow issues when closing the joint. A single 1 mm hole in an inconspicuous spot will save you a ton of frustration.
Final Assembly and Fillet Joints
With all the pieces welded out, it’s time to bring it all together. I use small blocks to hold everything steady and make sure my angles line up before locking it down with tacks. The final joints are standard fillets, equal leg lengths on both sides, smooth profile, no overfill.
Comfort is key here. Keep your torch hand relaxed and your filler feeding steady from a fixed position so you can see your puddle clearly. Consistent stepping and smooth stop-starts are what make the finished piece look pro.
The Result
Once it’s all welded and brushed out, the final piece looks incredible: sharp, symmetrical, and clean. The consistent wire brushing from earlier ties it all together, giving your aluminum that polished, professional look. If your project isn’t getting painted, this kind of prep pays off big time.
If you want to dive deeper into TIG aluminum work, grab a copy of my TIG Welding Textbook — it’s packed with breakdowns of corner and fillet joints, heat control, and filler management, plus access to full video lessons and our private community.
Watch the Full Lesson
👉 Watch the full “TIG Welding Pyramid Joint” lesson on my YouTube channel here: Watch on YouTube
You’ll see every step of this project in real time: from prep and setup to the final welds, and pick up techniques you can apply to your next aluminum job.
Cheers,
Dusty
Download your exclusive Beginner's Guide to Aluminum TIG Welding!
Enter your information below to receive exclusive PDF mini-textbook straight to your email.
We hate SPAM. We will never sell your information, for any reason.

